Showing posts with label blimp. Show all posts

Saturday, June 16, 2012

The Navigational Blackbox

As Im getting ready for the Nat Geo talk this week, Im also trying to anticipate field work on Kauai that is beginning Monday (but I won't arrive until next Saturday). One bit of electronics that I've always wanted is a data logger that records location, orient

NewImage

ation, tilt, yaw, bearing, and magnetic readings in a precise and rapid way. This would be useful, for example, for logging images of taken from a blimp so that they can be better corrected and georeferenced.  More importantly, a data logger such as this would be ideal for the GPR -- one could record the antenna angle and orientation relative to the ground so that the data can then be correctly modeled to take into consideration the direction the antenna is pointed.  Lacking this information, one assumes the antenna is pointed straight down -- but we known when we go across any terrain that this isn't true. Even when the terrain is relatively flat, there are often bushes and other kinds of things that one has to go over and that can create artifacts in the data. Dean Goodman's software GPR-slice software can make use of topographic information to help correct for terrain changes -- but this is only going to handle very large changes (such as surveying over a mound or down a hill).  What we really need is a little box that sits on the antenna and that records the position and orientation as the antenna moves.  And if we can also collect magnetometry data - boom - we have an instant mag map

The way to do this, I think, is with an arduino board and some sensors. I got an Arduino Mega 2560 board from Adafruit.  I then added a SparkFun triple axis magnetometer, 6 degrees of freedom accelerometer, an OpenLog data logger and the adafruit ultimate GPS.  All for about $150.00.   

I started using the incredibly cool Fritzing tool (http://fritzing.org/) which provides means for creating wiring diagrams and electronics.  The tool has many of the breakout parts for the arduino ready for cutting and pasting and the user libraries are huge.  What is particularly cool is that one can create an electronic device and then have it manufactured. I guess they aggregate bunches of board designs together and then get them printed en mass as some German factory. Cost is per board and goes down the more one orders.  So you can do some DIY stuff to try things out and if it works well, you could mass produce the boards to your own specs. 

Following the excellent wiring diagrams on Adafruit and SparkFun, I created a device that put all these pieces together (below). My wiring isn't particularly well organized but I was more interested in tracking the places to connect the wires for the multiple devices.

NewImage


NewImage


This is actually my second device for arduino. The first was a simple one built on a Arduino Uno board. All it does right now is runs a program that sends 5 volts in a particular pattern of timing to one of the output pins. Two mini-USB cords are connected to this pin (and ground) and plug into two digital cameras (Ricoh GR III).  One of the cameras has been modified to shoot near IR photos (and has a yellow filter). Together they provide a poor-man's four band (R,G,B, + NIR) camera.  The Arduino device triggers both cameras every 3 seconds -- this way we get synchronized shots that can be then be merged to form a single 4-band image. It works quite well - runs off of 3 AA batteries, is light weight and hangs from the camera mount that is suspended from our blimp or kite (or hexacopter).  I might add a GPS logger to it as well so that we can use it to record locations for each photo pair - that wouldn't be hard or very expensive. I bought an SD card logger ($20) for the Uno and wired it up. All I need is to get another Adafruit Ultimate GPS breakout (for $25). 

I should mention that the Adafruit Ultimate GPS is pretty sweet. It has a built in logger (64K), can track 66 satellites at a time and do 15 measurements a second. Plenty for the kinds of applications we have...


Sunday, June 7, 2009

Sunday Puttering...

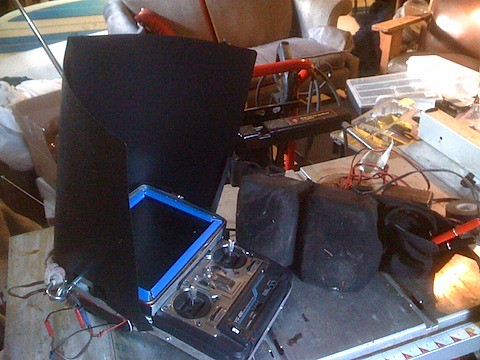
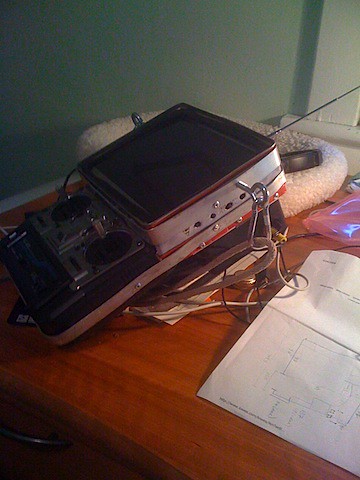
I've finished the new radio controller with video. I added a sunshield and a belt pack for the two 12-volt batteries that power the LCD panel and the video receiver. In the photo to the right, you can see the latest version with the waist-worn battery pack. IMG_0075  

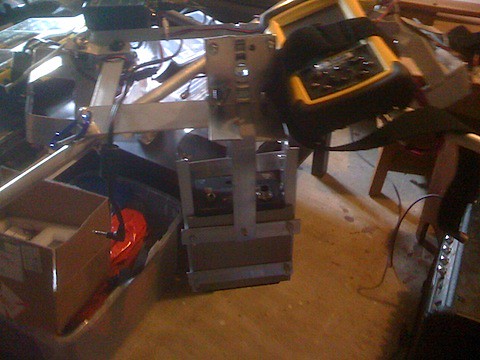
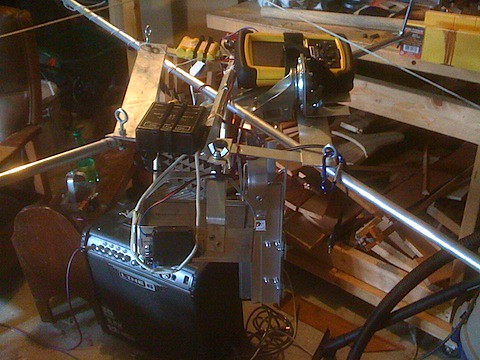
I also constructed a rig add-on for the new laser range finder. This device measures distance to the ground and stores data in a Recon data collector. Combined with post-processed GPS data collected via the Trimble GeoXH units, we can determine the elevation of the point immediately below the cameras. Woot. To do this, I need to make a hanger that would allow the rangefinder to hang directly down with 2 degrees a freedom. A trip to Harbor Freight and the purchase of a chair caster solved that problem (plus a bunch of stock aluminum).


IMG_0077 IMG_0078

Tuesday, May 5, 2009

Homebrew RC Controller with Video Hack

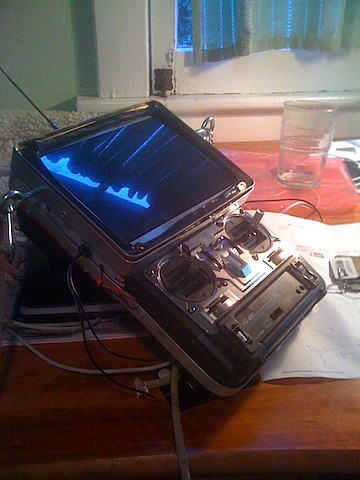
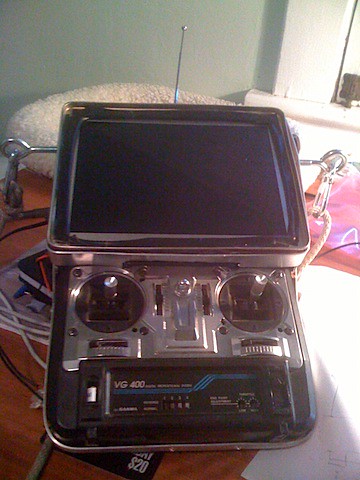
In our attempts at using the blimp as a platform for photographs the one thing that has always plagued us is a lack of knowledge as to whether or not the photos are being taken and if we have adequate coverage. To resolve this problem, I bought a 7.8" LCD panel on ebay (an OEM monitor that probably goes into cars for dvd players) - that cost about $40. I added a video receiver. With a holiday cookie tin, I then assembled a frankensteinian concoction: an rc controller with 7" LCD video that is linked to the blimp cameras (using one of the cameras VGA output). The look is decidedly homebrew - I fashioned an aluminum frame to hold the pieces together and used cookie tin to hold the monitor (you can see the xmas trees in the gaps not covered by the aluminum frame). On the back is the video receiver. Two 12-volt batteries (the brick kind) are required and I'll put them in a fanny-back to trim the weight of the device. Photos are below.
IMG_0056
The RC controller (Airtronics VG400 72 Mhz FM, 4 channel. Up/down on the right toggle activates one Canon A590, Left/right on the right toggle activates the other Canon A590. The left toggle controls the trigger on the Fujifilm NIR camera). The screen is a 7.8" OEM LCD panel from ebay. It is powered by 12-volts and uses a simple RCA plug for video in. The panel is built into a x-mas cookie tin and bolted to the controller. The wires sticking out will go to two 12-volt batteries.
IMG_0057
Other side. The holes on the right side allow access to the monitor controls. The box attached to the back is the video receiver. I repacked that into a standard Radioshack electronic project box.
IMG_0058
Front view. The mad bolts on the side are oversized I know. but they permit a strap for hanging around one's neck.
IMG_0059
Blurry side view. You can see the video receiver box and the RCA video jack (out) that feeds into the monitor. The video receiver antenna is the flat plastic thing velcro'd to the top surface.

Monday, March 2, 2009

New Photo Rig

I have been working on a new camera rig for the new 15' blimp (Floatograph) we recently purchased with Geography. Geography also bought a series of new cameras: 2- Canon Powershot (A590 - 8 megapixel and image stablization) and 2 Fujifilm FinePix IS-1. The latter is particularly interesting as it records near-infrared in addition to visible light (wavelengths 400-900 nm). We also got a battery powered video transmitter that can be used to send NTSC video output from a camera to a ground receiver and displayed on a monitor.

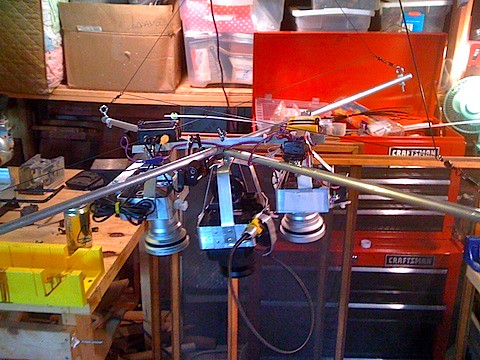
Using the Airtronics VG400 for the controller, servos and transmitters, I created new mounts for the cameras. The mounts are simpler than earlier versions as I realized that some of the design considerations that John Dudgeon had used were specifically for flying cameras with (the much more volatile kites). I also was able to place some of the "common" components on the picovet suspension.   

Below is a photo of the rig as I was nearing completion. I added means for tiling the Canon Powershot cameras out to the sides - so that we could get overlapping images and wide coverage. The near-IR camera is in the center. Since it had a cable release socket, I used a cable to trigger the IR shutter combined with the radio controlled servo. I need to beef up the hanging parts of the picovet and replace swivels and whatnot.

I am excited about trying this out.


200903021807.jpg

Saturday, August 23, 2008

Photosynth

Microsoft's new Photosynth is probably one of the coolest bit of technology released by the company in years. It is the product of Microsoft Research and a number of computer scientists from my old alma mater, the University of Washington. Photosynth is a web service that runs through a browser (Windows only for now) that takes stacks of digital photos and merges them into a single, mind-blowlingly cool 3-D arrangement. This is like a 3-dimensional panorama and ideal for photographing subjects where you want an overall view but also the ability to "drill down" to see detail. And Photosynth does this without any preset reference points -- it just takes the pile of photos taken from every crazy angle and matches up points across them all and then produces a 3-dimensional view.

One of the great thing that photosynth does for me is allow me to take blimp photos that have all sorts of yaw, roll, rotation issues and merge them into a single viewable entity. I've been working on this problem for a while - though a wide range of panorama building software (e.g., hugin, Panotools, Autopano, PTAssembler, Tatuk AIC, ArcMAP, ERDAS, DoubleTake, PTGui Pro, and many others). The problem I have is that the photos are so uncontrolled in the blimp in terms of their orientation and distance from subject (much less the issue of the ground topography) that the solutions are not very good and it take a lot of manual work to fix them (if that is even possible). The best solution Ive come up with right now is either Adobe Photoshop CS3 "PhotoMerge" option or PTGui Pro (though DoubleTake is great for a small # of photos). Both seem to work best when the camera has a constant height, the images are sequential, and the topography isnt too lumpy. That's great but it's not easy to achieve.

Photosynth really changes all of this since it is built to examine 3-dimensional things. It does a remarkable job of merging photos together that vary in height, roll, yaw, resolution - easily the best I've ever seen. Now, first thing others ask me about these products is whether or not you can "flatten them" to put into GIS -- that doesn't currently seem possible (it would require more processing to do integrated projection of the aggregate set of images). Ideally, that will be forthcoming but who knows (its free as it is). But as it stands right now, it is a powerful (and easy!) way of visualizing an archaeological landscape with all the detail you can possibly want (depending on your camera and the load on the photosynth servers - it has been pretty popular since being listed on Slashdot).

Here are a couple of the "synths" I've created in the last few days:

Easter Island: Rano Raraku: Rano Raraku - 2

Easter Island: : Akahanga-Easter Island

Guatemala: Cotuzmalguapa

Greece: Mycenae Acropolis

Greece: Mycenae - Lower Town

I'll post more as I create them.

Also, you might want to check how this works and what they have in mind for the future (imagine having a cumulative set of images from everyone in the world for any place) http://phototour.cs.washington.edu/findingpaths/

Wednesday, July 16, 2008

More blimp photos

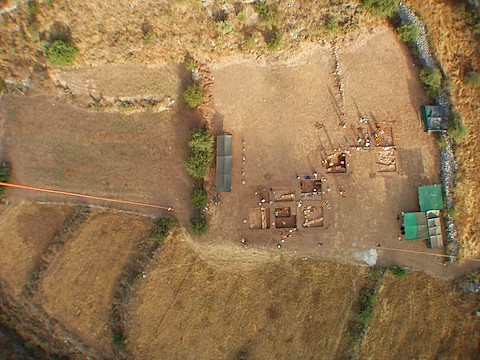
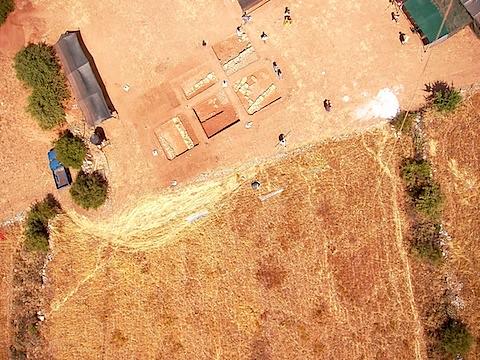
Yesterday morning was a great time for blimpin'. The wind conditions were perfect (none), the light even and the results great. We got a series of photos from the excavation area down the valley including new areas that Christofillis want's to acquire. Below is excavation area showing the architecture and the folks working in the units.

200807161117.jpg

Unfortunately, the afternoon was less successful due to failure of the rig to trigger the camera. We had great shots of the slopes of the acropolis and a large part of the acropolis itself. But no photos. Damn.

This morning, the winds were up and gusty. Since the areas we wanted to cover were close to the acropolis (up wind) there was no way of really flying the blimp. So we bailed and came back down to the hotel for some writing time. We are hoping to put together a list of projects that would be integrated into the collaborative teaching class this fall/spring and then lead to student projects in the summer.

Monday, July 14, 2008

Field Photos

Spent the day working on the blimp. Oddly, the blimp didn't have much lift today. I suspect this is because of the heat of the sun warming the air so that it is less dense and thus lowering the helium effect. But it seems about as hot as it was in Guatemala, so I am not sure. The weight of the rig is the same as it has been, so its not a problem with the payload. Tomorrow, we will start flying the blimp @ 6:00 so we can get cooler air. Perhaps that will help. We really need to get this much higher. I also will use the .5x wide angle lens. That should help significantly but not add any weight.


200807150028.jpg

Another issue is the picavet system -- when the blimp is floating in no wind and the camera hangs straight up and down, the rig tends to be tilted. I am not sure how to fix that yet - it causes spin as well. You can see a bit of the tilt here in the photo above. P7140004.JPG

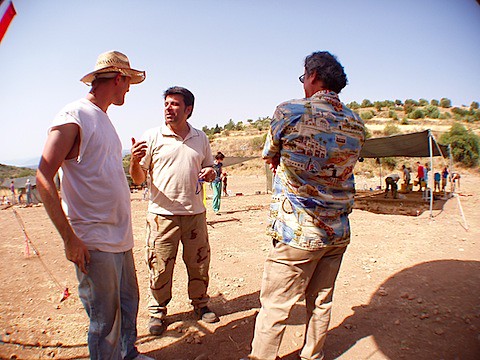
Above: Will Gilstrap (CSULB grad student), Christofillis Maggidis (Director, Dickenson College) and Paul Scotton (Director of Hellenistic excavations, CSULB). For the record, Paul is wearing a Huntington Beach Hawaiian shirt. Will is wearing a hat he found in the trash.

The day ended on a bit of a bummer note when an unnamed (yet pictured above on the left) person opened a freezer (yes, there is a freezer at the excavation site!) and ripped a large gash in the blimp. We repaired it in the afternoon using gorilla tape from a remarkably prepared graduate student named Joe. Hopefully, that will enable us to fly this morning (its 12:30 AM right now).