Tuesday, May 5, 2009

Homebrew RC Controller with Video Hack

In our attempts at using the blimp as a platform for photographs the one thing that has always plagued us is a lack of knowledge as to whether or not the photos are being taken and if we have adequate coverage. To resolve this problem, I bought a 7.8" LCD panel on ebay (an OEM monitor that probably goes into cars for dvd players) - that cost about $40. I added a video receiver. With a holiday cookie tin, I then assembled a frankensteinian concoction: an rc controller with 7" LCD video that is linked to the blimp cameras (using one of the cameras VGA output). The look is decidedly homebrew - I fashioned an aluminum frame to hold the pieces together and used cookie tin to hold the monitor (you can see the xmas trees in the gaps not covered by the aluminum frame). On the back is the video receiver. Two 12-volt batteries (the brick kind) are required and I'll put them in a fanny-back to trim the weight of the device. Photos are below.
IMG_0056
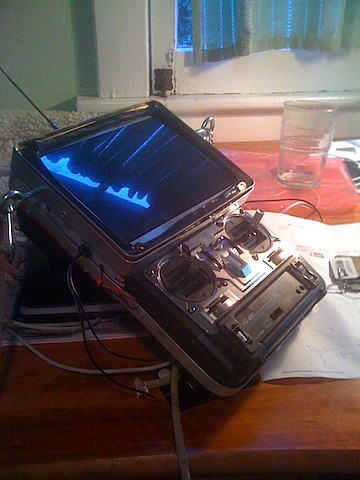
The RC controller (Airtronics VG400 72 Mhz FM, 4 channel. Up/down on the right toggle activates one Canon A590, Left/right on the right toggle activates the other Canon A590. The left toggle controls the trigger on the Fujifilm NIR camera). The screen is a 7.8" OEM LCD panel from ebay. It is powered by 12-volts and uses a simple RCA plug for video in. The panel is built into a x-mas cookie tin and bolted to the controller. The wires sticking out will go to two 12-volt batteries.
IMG_0057
Other side. The holes on the right side allow access to the monitor controls. The box attached to the back is the video receiver. I repacked that into a standard Radioshack electronic project box.
IMG_0058
Front view. The mad bolts on the side are oversized I know. but they permit a strap for hanging around one's neck.
IMG_0059
Blurry side view. You can see the video receiver box and the RCA video jack (out) that feeds into the monitor. The video receiver antenna is the flat plastic thing velcro'd to the top surface.

No comments: